Spinning up a new Linux VM using Hyper-V is surprisingly easy. I managed to get CentOS installed and running on Windows Server 2016 is no time, but there were a few gotchas along the way.
In this post, I document the steps I took to install CentOS 7.5 on Hyper-V. I installed Hyper-V on a Windows Server 2016 box, but these steps should also work just as easily on Windows 10 and with other Linux distributions.
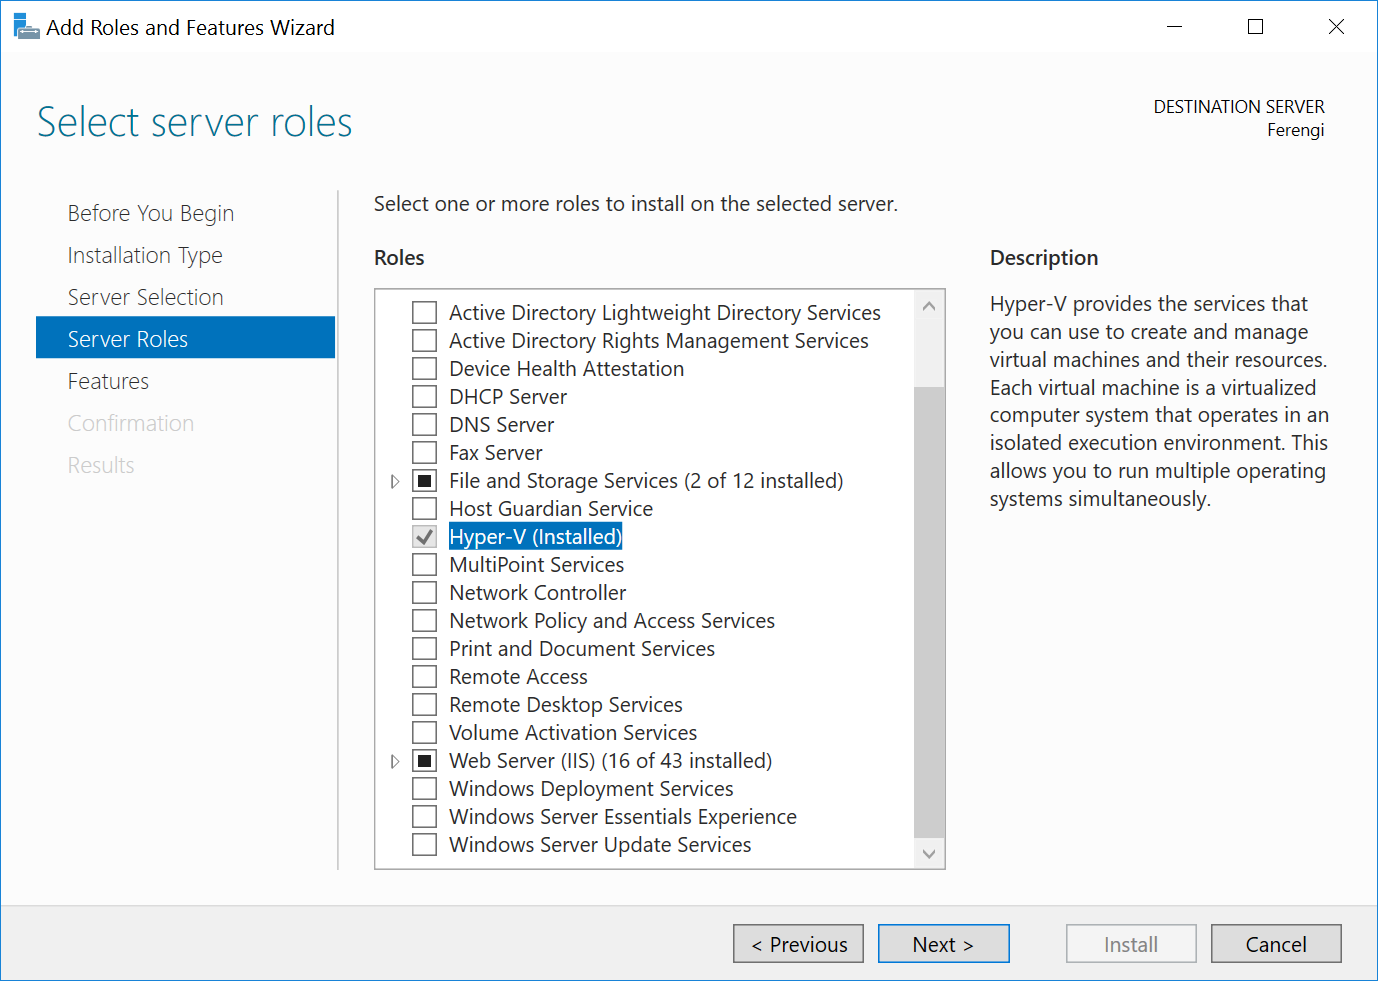
Step 1 - Installing Hyper-V
The first step is to install Hyper-V.
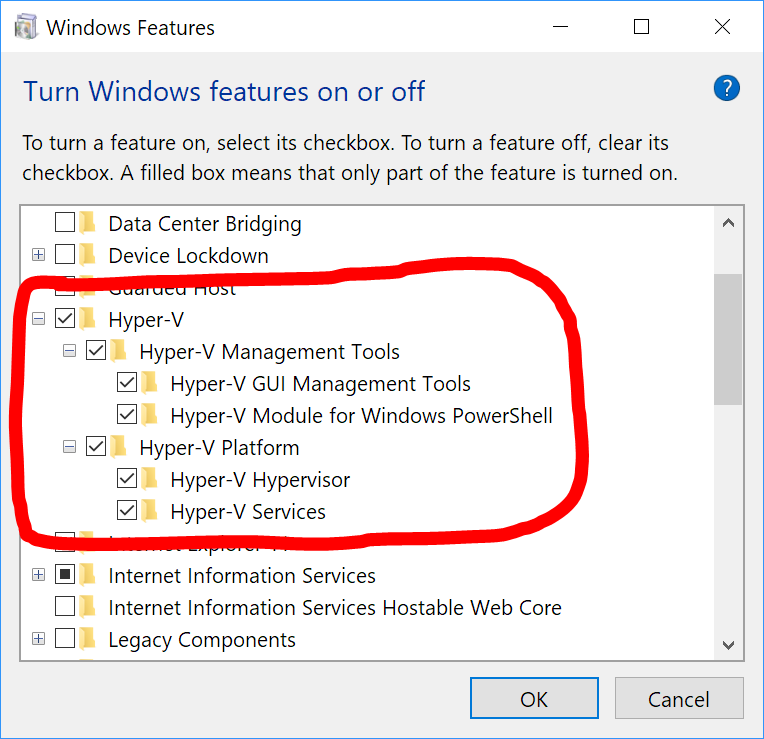
To do this, search for "windows features" and open the control panel item "Turn Windows features on or off".
Then select Hyper-V and proceed to install it.
On Windows Server 2016, you'll go through a series of pages with options to create virtual switches, configure virtual machine migration, and setup the default storage locations. Then you'll need to restart the server.
On Windows 10, you'll simply need to restart after making the selection.
In my case on Windows Server 2016, I setup a virtual switch, as this is required to get network connectivity, I disabled virtual machine migration as this is a staging server, and I changed the default storage locations to another drive.
On Windows 10, a default switch is setup by default that operates using NAT.
In production, you may want to configure virtual machine migration to allow you to move VMs from one host machine to another without having to shut down the VM. A very useful feature.
Step 2 - Using Hyper-V Manager
Once you have installed Hyper-V, find and run Hyper-V Manager from the start menu.
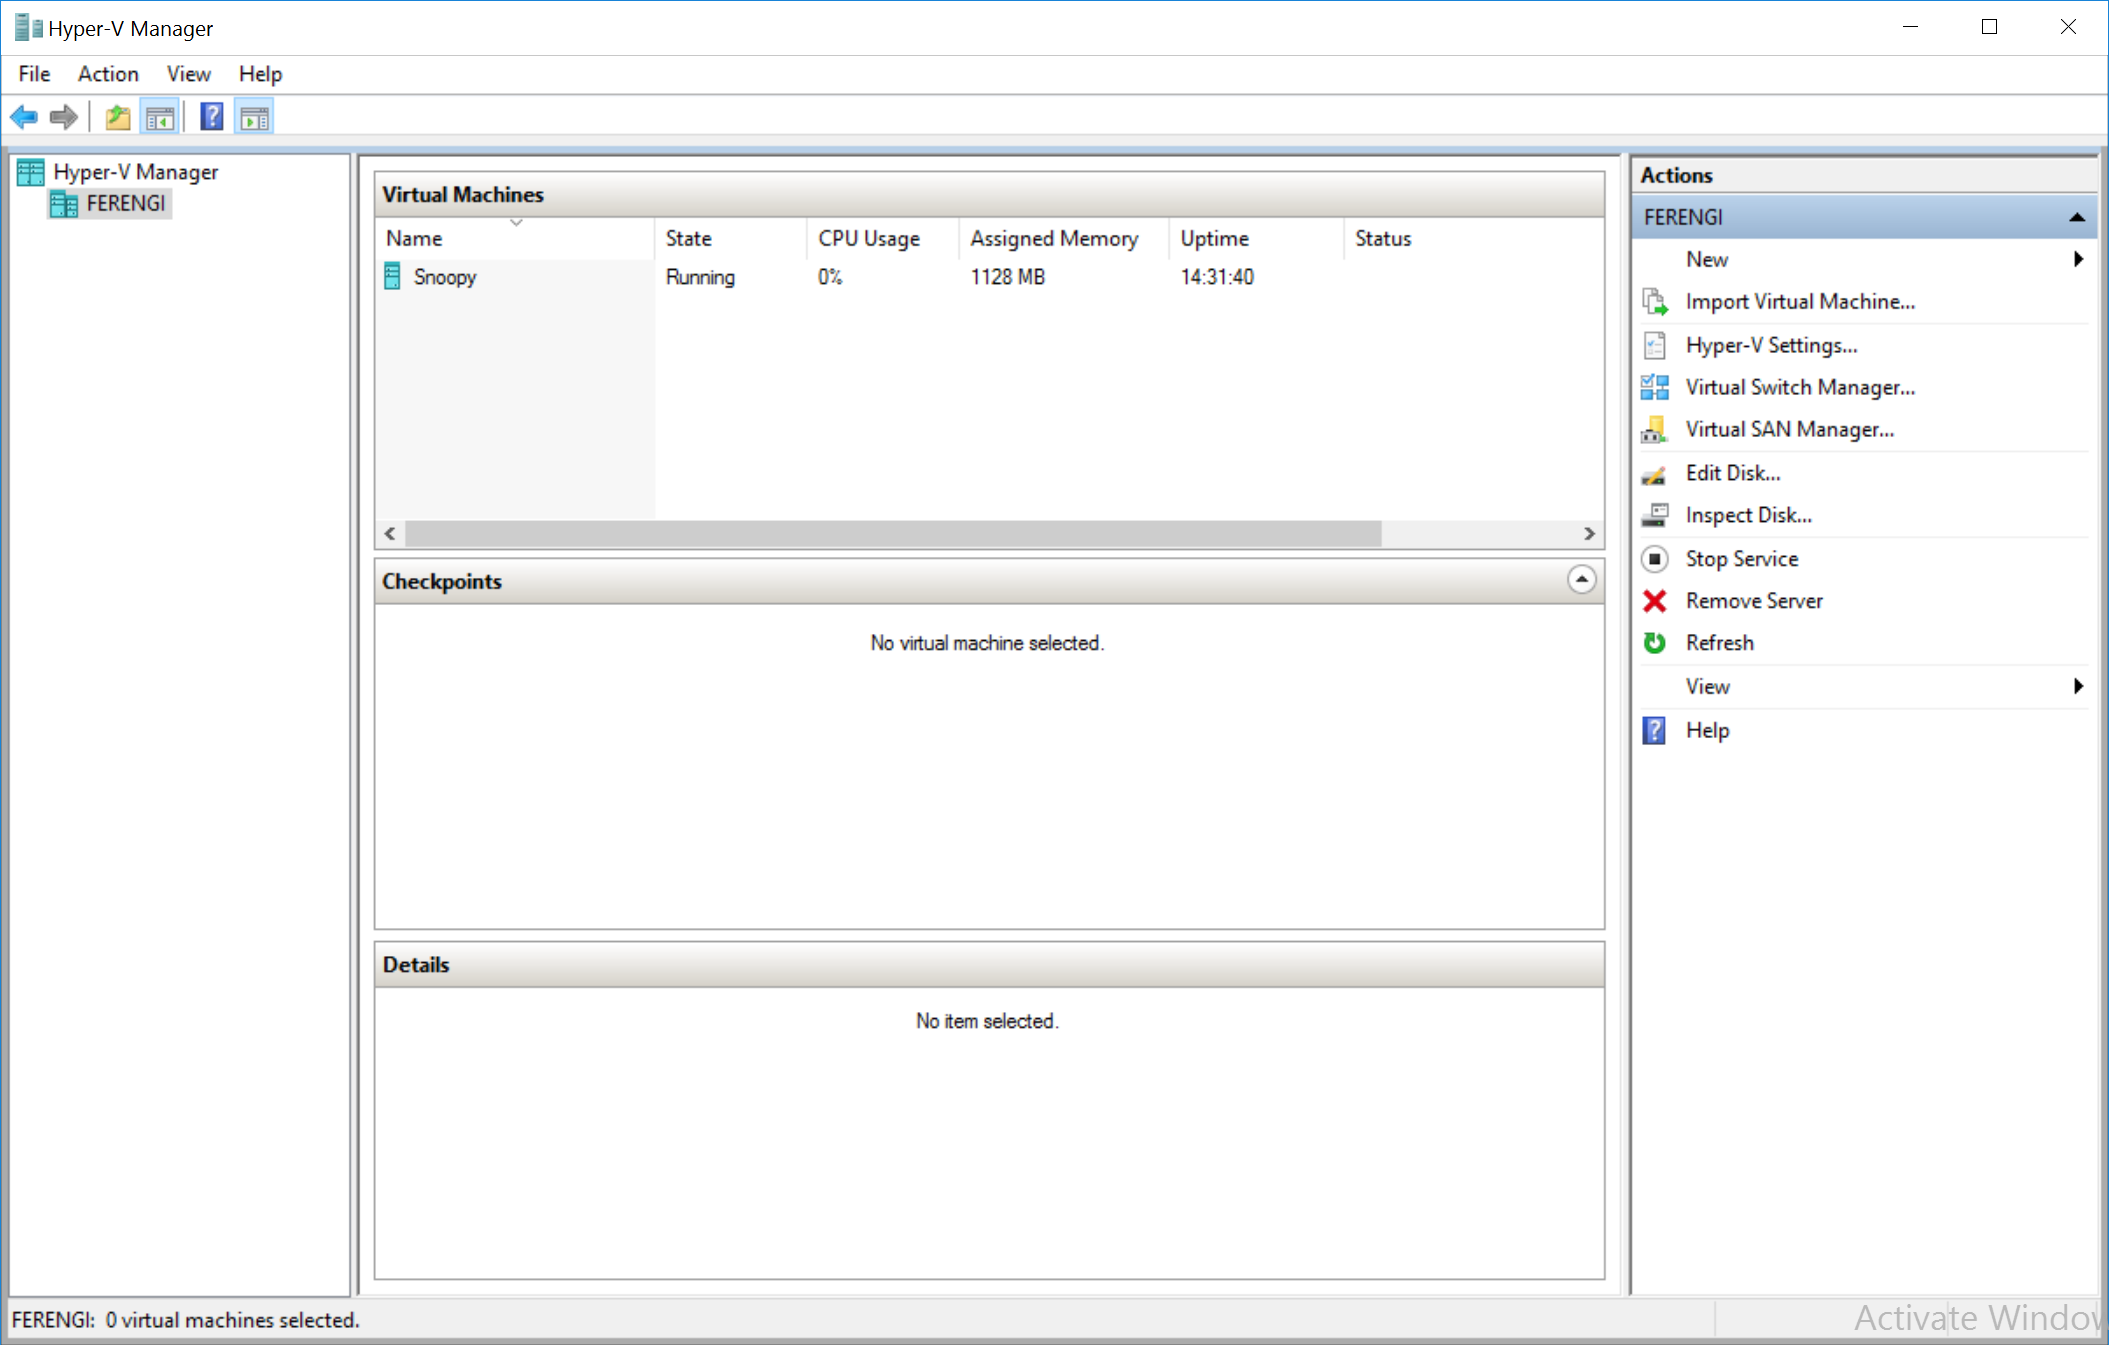
Hyper-V manager lets you create and manage your virtual machines. You can also connect to other servers to manage their VMs remotely.
To add another server, right click on Hyper-V Manager on the left panel and select Connect to Server.
Step 3 - Create a New Virtual Machine
The next step is to create your VM. Start by selecting New, Virtual Machine, in the actions pane on the right of Hyper-V manager.
Name and Storage Location
First, you'll give your machine a name and choose where to store it.
Generation
You'll then choose which generation to use. I selected Generation 2 as I'm running the 64-bit version of CentOS.
If you need to run a 32-bit VM or need to be able to run your VM on older versions of Hyper-V, you may need to select Generation 1.
Memory
You'll then want to decide how much memory to assign to the VM.
The minimum for CentOS 7 is 1GB. I assigned 4GB and selected to use dynamic memory, so that this can be changed later.
Network Configuration
You'll then need to configure the network connection. I chose to connect to the virtual switch I setup earlier.
On Windows 10, simply selecting the Default Switch that is setup automatically should suffice.
Hard Disk
You'll then want to configure a virtual hard disk. By using the VHDX format, this can dynamically expand as required.
Installation Options
Finally, you'll need to set the installation options.
I chose to install an OS from a bootable ISO. I went with the Minimal 7.5.1804 ISO from CentOS.
Step 4 - Configure Settings (& Workarounds)
Before starting your new VM, there are some settings you need to change.
Boot Failure
If you don't change these settings. You may find your VM sits on the start-up screen saying:
PXE Network Boot using IPv4 (ESC to cancel)
Performing DHCP Negotiation .....
Before finally arriving at a Virtual Machine Boot Summary that indicates that the image's hash and certificate are not allowed (DB).
Solution: Change Secure Boot Template
Right click on your VM and go to Settings. Then go to the Security tab and change the template from Microsoft Windows to Microsoft UEFI Certificate Authority.
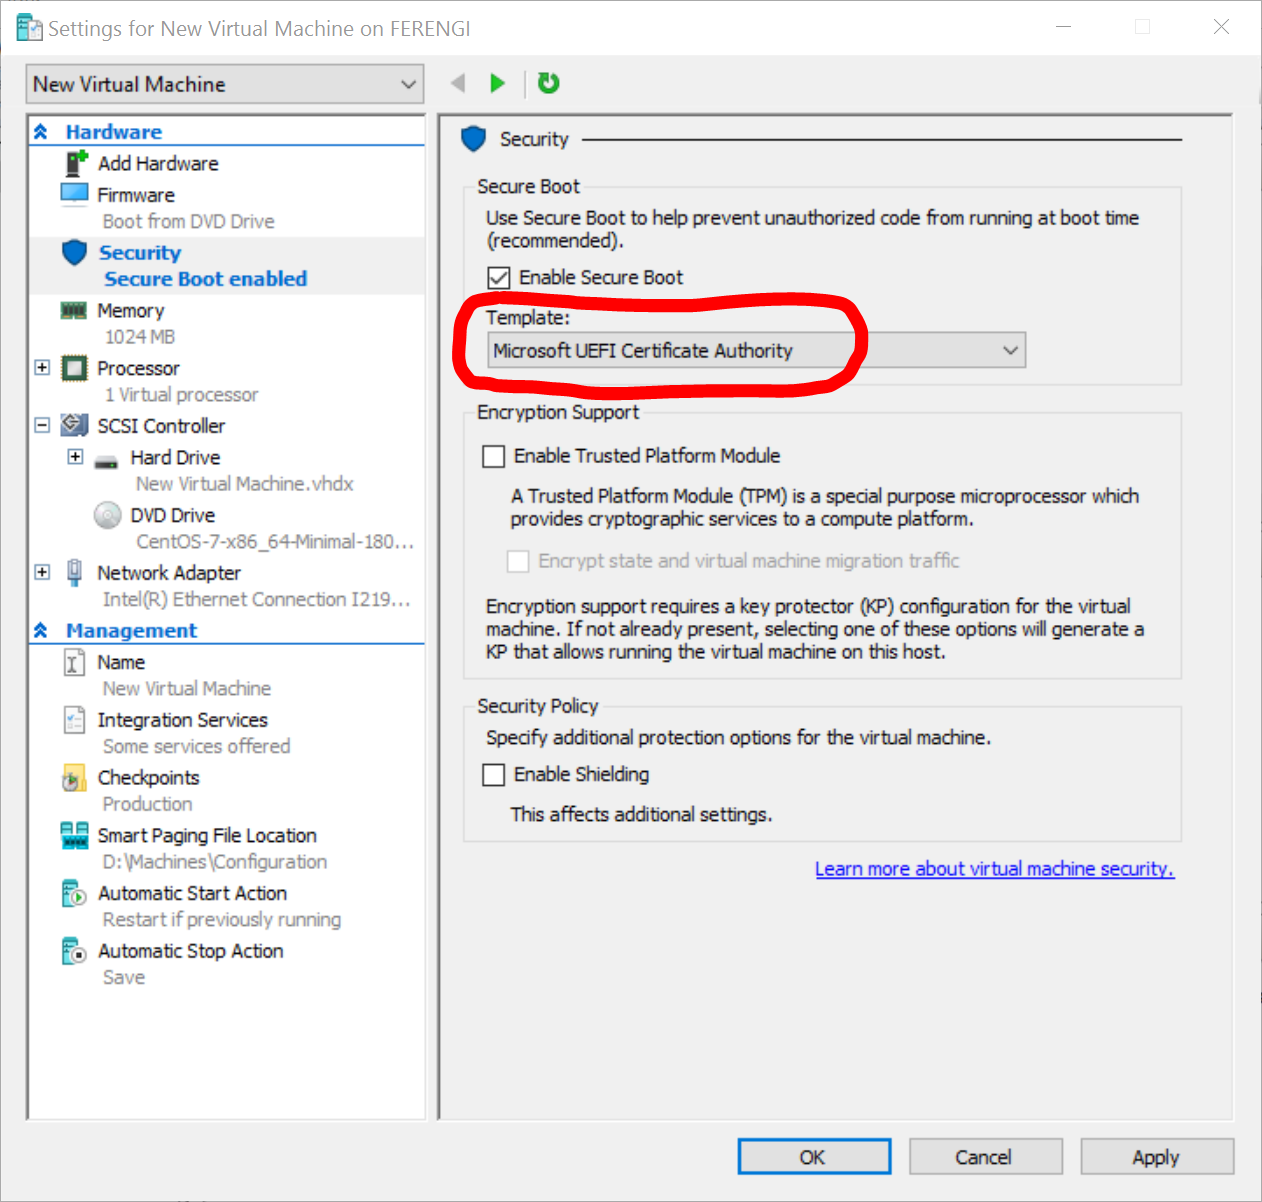
You'll now be able to boot from the ISO and install Linux CentOS or any other distribution.
Other Settings
I also changed the VM to use 2 Virtual Processors for improved performance.
I also went into Network Adapter / Advanced Features and changed from a dynamic MAC address to a static MAC address. This allowed me to configure my local DHCP server to assign a static IP to the VM.
Step 5 - Install OS
At this point you can install your operating system. I proceeded to install CentOS and it was up and running as soon as the installation was complete.
Disable the Disk I/O Scheduler
As you are running inside Hyper-V, there is one setting to change once CentOS is installed, the Disk I/O Scheduler.
Normally, you want CentOS to handle the scheduling of Disk I/O. However, Hyper-V is responsible for this and can do a better job as it is managing all the virtual machines.
Therefore, you'll want to disable the Disk I/O Scheduler in CentOS.
As root, execute this command to disable the scheduler in CentOS:
echo noop > /sys/block/sda/queue/scheduler